Warning
FYI, I’ve had a report from someone else that this technique got their account temporarily locked. After changing their account password they were let back into their account. Facebook claimed their account had been phished, probably related to the extension the technique came from (see below). It happened to me, too, but only once - later I tried again and had no issues.
So remember to be careful and only use sockpuppet accounts!
Intro
Howdy! Today’s post is brought to you by a tip from @technisette. A couple of months ago she sent me a link to a Chrome extension that had some cool Facebook tools integrated. After a short time using the extension, the research account she’d been using was terminated by Facebook and she was looking for a way to replicate the “Find Groups for User” feature without the risk of running the extension. The following guide shows how it’s done and doesn’t require any coding, only two tools: Browser Dev Tools and the Postman API developer GUI. Screenshots in this post will be in Firefox - Chrome or Edge will look slightly different, but should have similar naming.
Postman Setup
Postman is a program for making manual HTTP requests against third-party APIs. Download the program and, if it prompts you to install, install it. Otherwise, just unzip and run the Postman program.
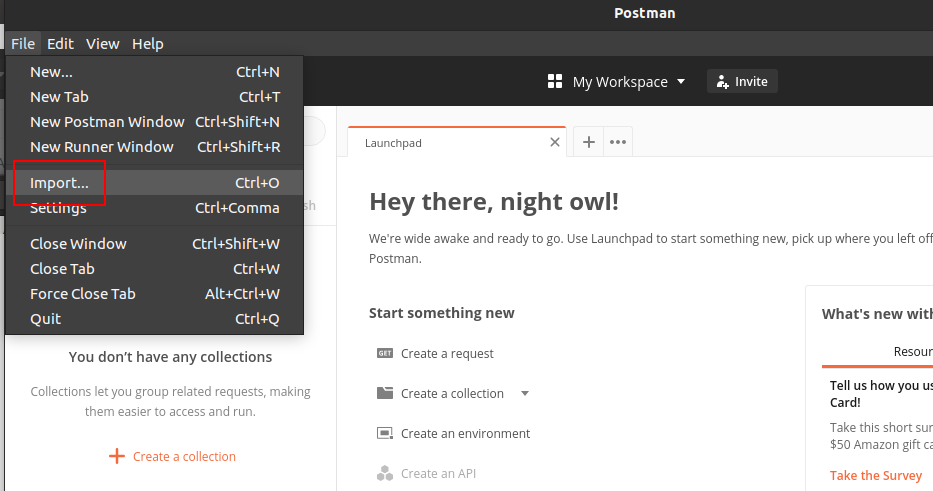
Open Postman, then click the File menu, then the Import option.
On the Import menu, click the Link tab and paste the following link:
https://www.getpostman.com/collections/a7555b0c8ab2298cae48. Then continue and
finish importing the collection.

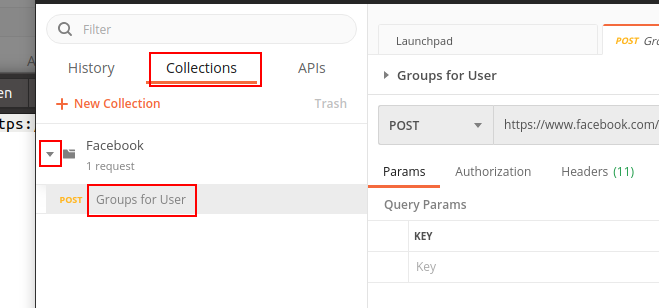
After importing the collection, check the bar on the far left of the window and click the Collections tab if it is not selected. The import step created a folder named Facebook, click on the arrow next to it. Finally, click on the request item named Groups for User. This will open a tab in the main body of the Postman window.
Facebook Setup
In order to use this script, you must be “logged in” to Facebook. This requires some data to be copied from a browser window where you’ve logged in to a Facebook account. If possible, try to use a sockpuppet account for this just in case Facebook decides to ban users caught using this technique.
Target User ID
You will need the target’s Facebook User/Profile ID. This can be found using the instructions in the Before we start… section from OSINT Curious or the Who Posted What ID tool. Save this ID for later.
Cookies
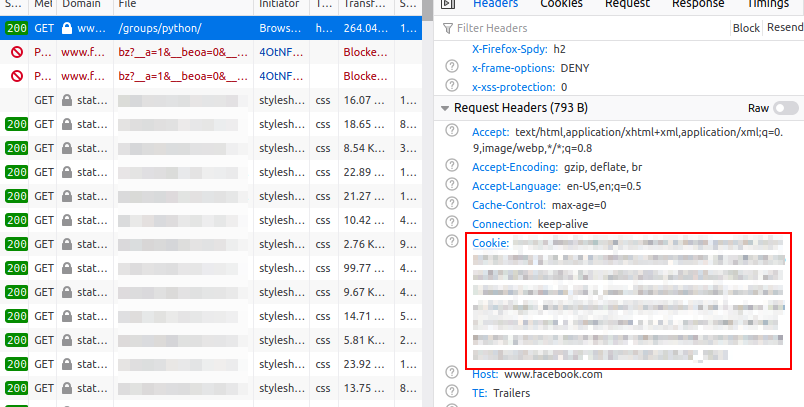
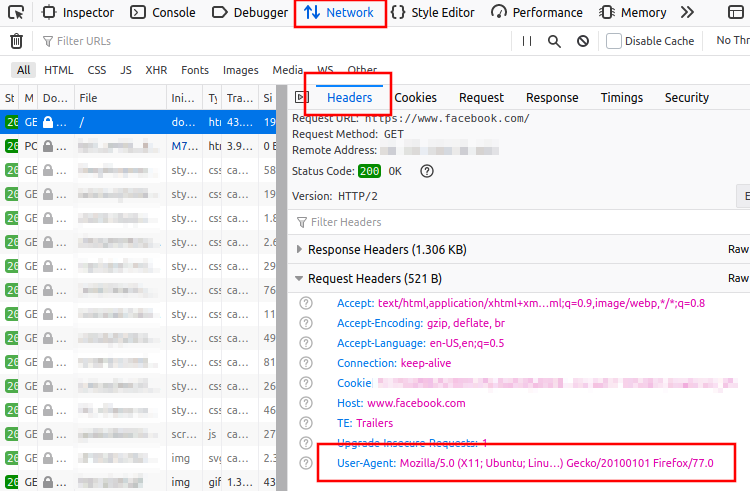
In a browser window (screenshot below in Firefox), log in to facebook.com. Open your Browser Dev Tools (F12) and choose the Network tab. Refresh any Facebook page and then select that page request in the network tools.
Look in the Headers section for Request Headers and find the Cookie
section. Copy the entire cookie value (except the Cookie: part) into
another file for later use. Note that this contains your own Facebook user ID
and credentials that would allow another user to take over your Facebook
account, so don’t share this Cookie with anyone else.
User Agent
@OsintSupport on Twitter recently informed me that the Cookies from Facebook are tied to a specific User Agent - this is the value that tells Facebook which browser (and version) you are running. This means we need to copy the User Agent from the same browser session you got the Cookies from.
You can use the same Dev Tools window from the last step to get your User Agent.
Look in the Headers section for Request Headers and find the User-Agent
section. Copy the entire User Agent value (except the User-Agent: part)
into another file for later use.
Additional Token
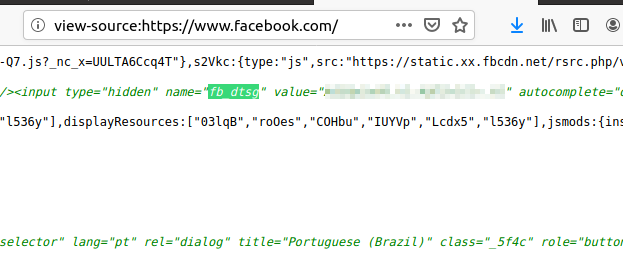
The final bit of Facebook data we need is called the fb_dtsg token. I’m not
entirely sure what it does or whether it is tied to a single user account, so I
recommend that you keep this token safe from others as well.
To get this token, you can view the page source for the Facebook home page when
logged in. Open
view-source:https://www.facebook.com
in your browser. Press Ctrl+F and search for the value fb_dtsg. There
should only be one search result and slightly to the right of the result will
be some text that says value= with more text in quotes. Copy that text within
quotes (but not the quotes themselves) to another file for later use. Make sure
to include any dashes, underscores, or colons in addition to the alphanumeric
text within quotes.
Making the Request
Back in Postman, select the Headers tab on the request. It will be
pre-filled with some values and the section for “cookie” will be labeled
“<insert_cookie_here>”. Replace that text with the cookie value you copied from
Facebook.
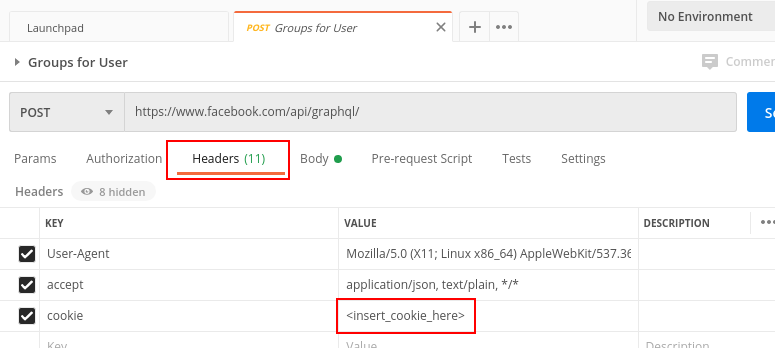
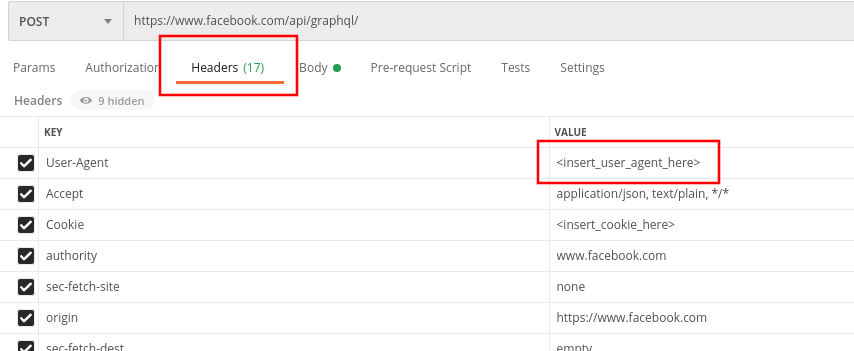
Do the same with your User Agent value in the User-Agent section. Replace the
“<insert_user_agent_here>” text with your User Agent.
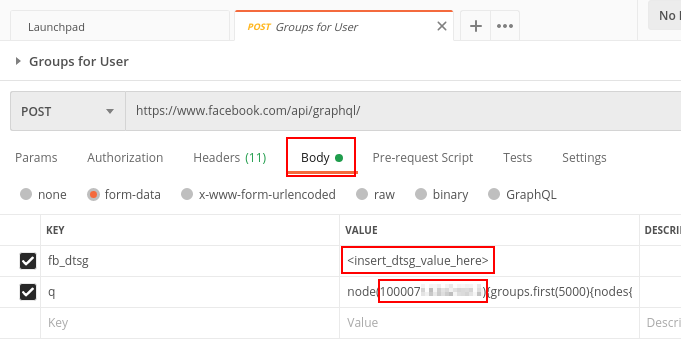
Next, switch to the Body tab. Replace the value “<insert_dtsg_value_here>”
with the dtsg text from Facebook and then in the “q” section, replace the ID
number after “node(“ with the ID of your target profile. If 5000 groups is too
few (or too many) replace the number “5000” in the query section with a number
of your choice.
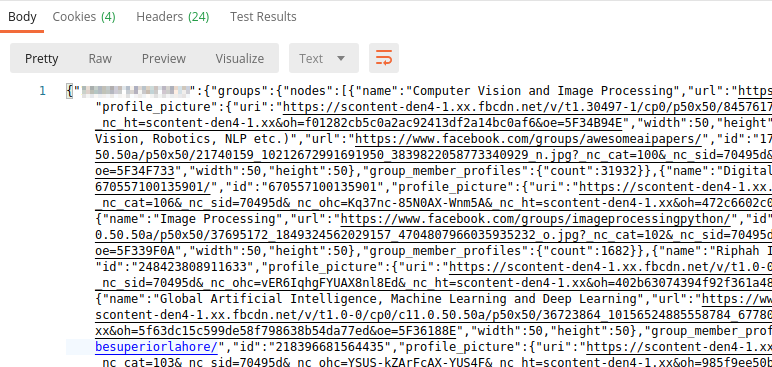
Finally, click the “Send” button in the Postman UI. After a few second, the bottom section should show a large mass of JSON text (see below).
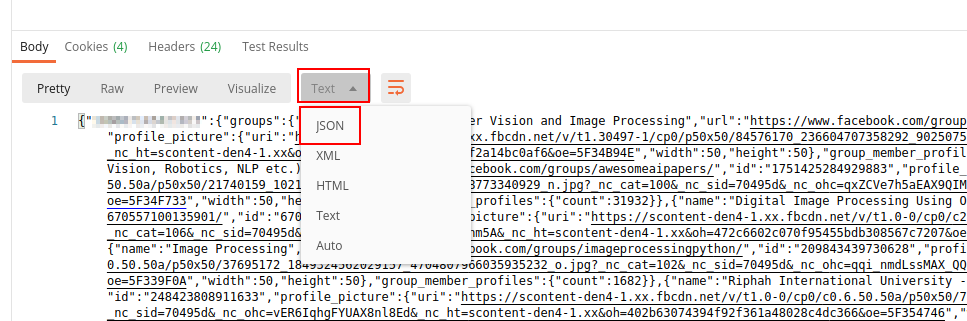
Format this text for easier viewing by clicking the button labeled “Text” and choosing “JSON” from the drop-down. It will highlight the text and separate it vertically.
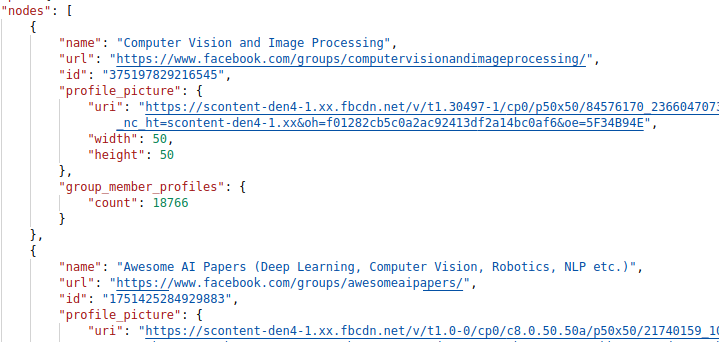
Once the text is formatted, look for lines labeled “name” and “url” to find the group names and URLs that the user belongs to.
To see the groups a user is an admin of, scroll down near the bottom until you reach a section titled “admined_groups”. The groups that follow are the groups that this user is an admin of.